Diablo-like
Spite: Serpentide
This is the 6th project I contributed to during my time at The Game Assembly, made in our very own Direct X 11 Engine. I worked in many different areas of the game, adding mostly to the graphics engine as well as some gameplay features.

Deferred Rendering

The Applies Graphics Programming course at TGA provided us with the knowledge to build both deferred and forward rendering pipelines. We decided it would be best to use the deferred rendering base we had made in the course for our own engine, and it is mainly in this type of pipeline I am now used to working. This was mostly influenced by the deferred renderers ability to handle more lights than a traditional forward renderer. The Rendering pipeline includes support for ambient, directional, point and spot lights, particles, screen sprites and VFX models. Additionally hole punching, outlining, vignettes and depth fog are avalible as effects.
Graphics Debugging Tools

I implemented a couple of tools to make debugging the render pipeline easier. Firstly I implemented an easy to use list of toggles to enable and disable parts of the render pipeline, using Dear ImGui. Secondly I added functionality to view different stages and textures from the deferred rendering, such as all the generated gbuffer components. Additionally I added a renderer to draw debug lines, which worked well in massive amounts, each line was read in to a vertex buffer as one vertex each from an array built during the previous frames calls to draw a debug line(s). A tool to draw the rbg components of what's currently on screen separately was also developed to no only be able to look at colors, but also separate material channels in when looking at the gbuffer.
Graphics Engine
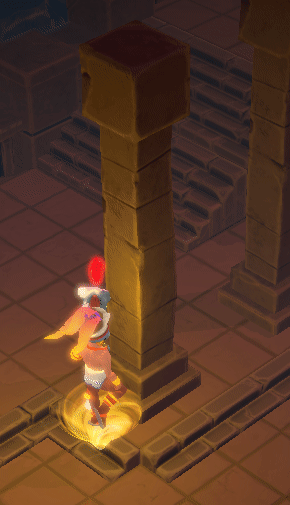
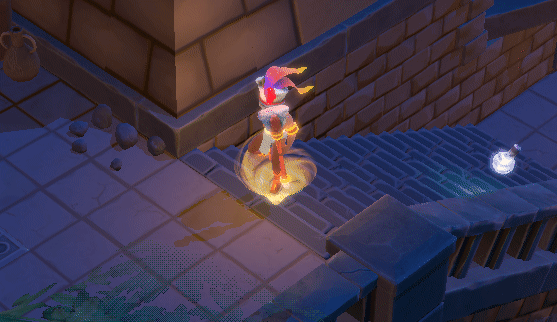
Hole Punch
For this project, we need the player to be able to go behind pieces of terrain and still be visible. There are multiple ways to go about solving this, but we decided it would be best to be able to open holes through geometry to show the player. This is done in the pixel shader stage of writing to the gbuffer. Models that have been tagged to be able to be pierced have a special pixel that does the following:
1. Figure out if the player is behind the model, using the dot product of the vector to the play and the vector to camera.
2. Interpolate a gradient from the center of the character on screen.
3. Apply ordered dithering to the gradient, and discard the pixels under the threshold.
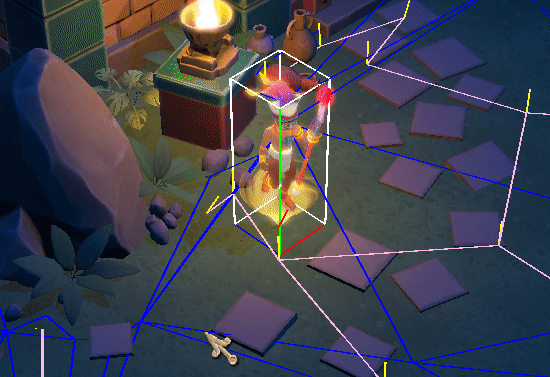
Particle System

I designed the particle system we used for the project. I wanted it to be as light weight as possible, so each emitter instance allocates an array particles of a set size when they are created, pooling all the particles. When a particle is spawned, the first non living particle in the array is activated, putting starting values in to it, then the count of particles is increased by one. When a particles dies, it is overwritten by the back living particle, and then the count is reduced by one. This makes it so all living particles are at the front of the the buffer and can easily be written to a vertex buffer with a single copy. Each Particle is then drawn using a geometry shader to turn each vertex in to a billboard sprite.
My teammate Perry Ivic also made a great tool for using the particles, for more information, visit his portfolio.
Shadow Map Alignment

A problem we ran in to was that the shadows cast by the directional lights shadow map would tend to flicker when the player moved. Since shadows were generated live, the shadow camera would simply follow the player. However, this caused all the pixels of the shadow map to miss align and cause nauseating flickers. To solve this, I separated the rotation and position elements of the shadow camera's transform. The rotation matrix is then applied first when inputting a new position, rotating it in to the camera's space. Then the coordinate can be rounded to the nearest whole pixel in the camera, before being applied as the new position of the shadow camera.


I was tasked with building an object structure for our engine. After weighing the pros and cons between no object structure, component systems and ECS, I decided that the latter would be the most educational, as we had not worked in it before. I used the popular tutorial created by Austin Morlan as the basis for our system, adding a some extra functionality to the system, but mostly keeping the structure the same. I added some functionality to check for components as well as removing components and entities in a safer manner by adding them to a destruction list that removes them properly once the program has finished an update loop.
Entity Component System

Path Finding and Funneling
Getting a path on the navmesh is done in three steps. First a start and end position on the mesh is selected. This is either done by calculating the closest triangles by centroid to the start or end, or by raycasting on to the mesh. This is a lodding opertunity as the raycast will provide more accurate results but be significantly more expensive. Creatures off the screen generally would use the closest centroid method. Secondly, the A-star algorithm using a simple euclidian distance squared heuristic and node weights are precalulated according to neighbour distance. If a valid path is found, the 'Simple Stupid Funnel Algorithm' is run on the path with a little bit of padding to make sure the path doesn't stray on the edge of the mesh, possibly making it fall off.
Doors and Obstacles

To be able to close of areas in the game, and since all characters move by navigating the navmesh, we decided that doors should simply be able to sever the navmesh in places of choice. I implemented a OBB vs Tri to check what triangles a door would occupy, then added a bitset on the navmesh, which maps to each triangle, allowing the doors to manipulate their triangles and turn them on or off for navigation. This does mean that the shape of the navmesh dictates the shape effective shape of the door, and it something we had to keep in mind when designing the level. Additionally, if a character already has a path when a door closes, they could possibly phase through it. Had I remade this system now, I would instead allow pathing through a closed door, instead letting characters collide and stop, which provides a more consistent experience.
Navigation Mesh
Packing and Preprocessing

I was in charge of the in engine navmesh, taking the obj file generated from the level editor of unreal engine. Each node is then loaded from each face in the obj file. A node consists of many elements, where many element are divided in to separate buffers so they may be looped over more effectively. Once each node is created, it's centroid as well as neighbours are calculated, a neighbour found when it matches two corners with the other triangle. Each vertex is then reordered within each triangle to make the longest edge the first. This is to make mapping to a triangles cartesian coordinates easier as the first point will be (0,0) while the next can be (length of first edge, 0) and the last placed, allowing us to store them as three numbers instead of six.